Untitled Tank Game - Part 1
The goal of this project is to take the experience I gained from my 3D Godot 3 vehicle prototype, and apply those lessons - along with my experience since then - towards making an improved version in Godot 4.
I want to make something that looks better, feels better, is more fun, performs better, and solves some of the problems I was unable to solve last time. Specifically, I want to develop a custom RayCast3D-based suspension, satisfying third-person aiming, the ability to design terrain in Blender, a basic enemy AI, and better 3D models.

Sliding Around
This is actually a temporary feature. While one of the main things I want to implement is a custom RayCast3D suspension and propulsion system, I'm not ready to add it here just yet as my attempts and experiments with it have had unexpected behavior, indicating I need to do more research.
Instead, temporarily, to allow the player vehicle to move around I'm just pushing it around as a rigid body, sliding it on the ground.
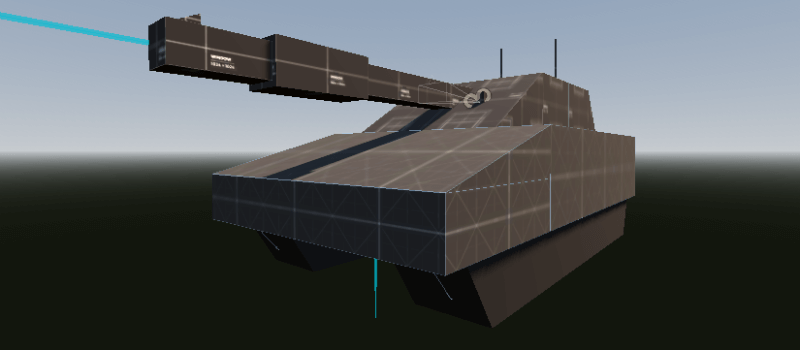
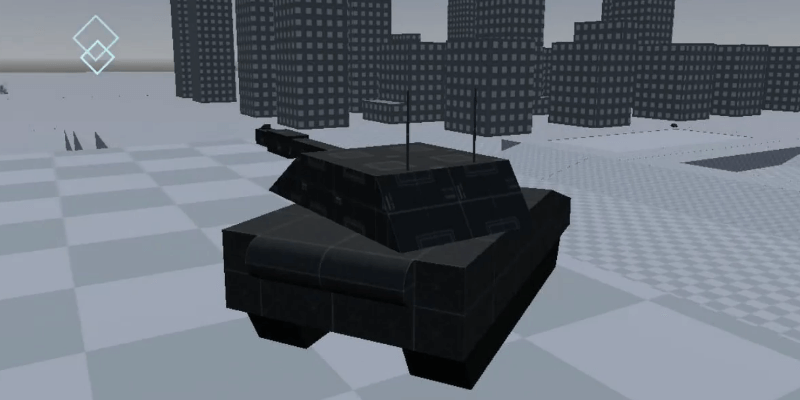
The tank was placed on two "pontoons" to allow the vehicle to slide while handling curbs as gracefully as possible.

Note:
Proper ray-cast suspension is added in a later post
There are three RayCast3Ds extending down from the underside of the tank. These detect if the vehicle is on the ground. Driving control is lost if all the rays do not detect anything under the vehicle.
Fake Suspension Rocking
When moving around there was a noticeable lack of tilting and rocking. So, to improve immersion, some fake tilting was added to the body of the vehicle when moving. A front to back tilt is set by the forward acceleration/deceleration, and a sideways tilt is set based on lateral forces.
This is a rough system, but it's adequate for now.
It provides the ability to drive around, drives up and down bumps and slopes, and it doesn't slowly slide down while resting on slopes (an issue I had with the built-in VehicleWheel nodes). Most importantly, it's quick, easy, and good enough to allow me to call this temporary system "done".
Third-Person Mouse Aiming
This is a feature that I wanted to include in the prior Godot 3 project, but didn't manage to solve. Spending more time thinking about it since then, and exploring how similar features work in other games, I had a conceptual idea and was ready to attempt it again.
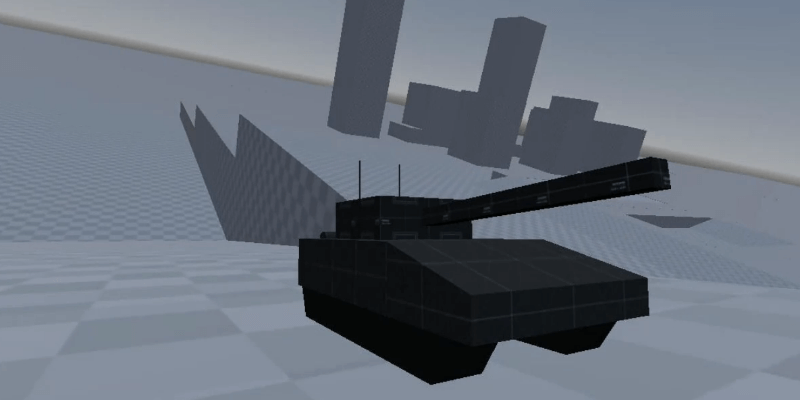
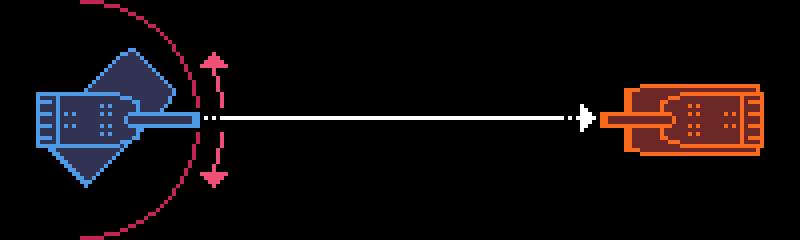
The goal is to be able to freely look around in third-person, at whatever speed feels comfortable to the player (different mouse speeds and accelerations). And while doing that, have the tank's turret rotate and elevate at a specified speed to point in the direction the camera is looking.
In first-person we can directly drive the turret. You push right, and the turret moves right at its assigned speed.
But we're not able to do that in third-person because the camera can swing around much faster than the turret. Directly linking the camera to the turret would require either slowing the camera down to the maximum speed of the turret (which makes it difficult to gain situational awareness) or to have the turret move as fast as the mouse (which is unrealistic.)
The solution here is to cast a ray out from a particular spot in the camera and identify where that ray intersects an object (or hits its maximum length) and instruct the turret to aim at that particular spot. That way the camera can move as fast or as slow as the player wants, and the turret/barrel will catch up at whatever speed is appropriate for that turret.

The code for projecting a ray from the camera and getting its intersection point might look like:
func _ray_spot():
    var center = get_viewport().get_visible_rect()
    center = center.size / 2.0

    var from = camera.project_ray_origin(center)
    var to = from + camera.project_ray_normal(center) * ray_length

    var state = get_world_3d().direct_space_state
    var result = state.intersect_ray(PhysicsRayQueryParameters3D.create(from, to, 1))
    return result.position if result.has("position") else to
This returns either the position where the center ray intersects something, or the point at the end of the ray (at a distance of ray_length.)
And the code used to align the turret to that target position might look like:
func aim_at(target_position: Vector3):
    var goal = (target_position - global_transform.origin).normalized()
    var turn_delta = aim_base.global_transform.basis.z.signed_angle_to(goal, aim_base.global_transform.basis.y)
    if abs(turn_delta) > 0.0002:
        aim_base.rotation.y = fmod(aim_base.rotation.y + turn_delta/5, TAU)
    else:
        aim_base.rotation.y = fmod(aim_base.rotation.y + turn_delta, TAU)

    var lift_delta = aim_base.global_transform.basis.z.signed_angle_to(goal, aim_base.global_transform.basis.x)
    aim_base.rotation.x = fmod(aim_base.rotation.x + lift_delta, TAU)
When this aim_at method is called on the turret it uses the signed_angle_to between the aim_base and the target position. In this case, aim_base is a Node3D I use to help determine which way to move the turret, helping to translate from the orientation of the world to the orientation of the vehicle. It is aligned with the turret node, but is unrestricted in it's movement speed.
With the turret in automatic control mode, when the aim_base is set, the turret will find the angular difference between the turret and the aim_base and move in that direction.
Note:
This was posted to the Godot subreddit: Simple tank vehicle prototype with a satisfying "over-the-turret third-person ray-cast" tank aiming mechanic.
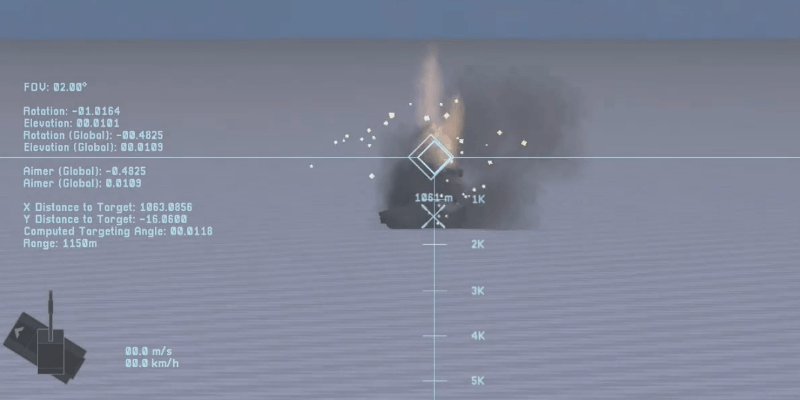
Adding Explosions and Improving the HUD Reticle
The projectile was updated to have a physical shape, a dynamically-sized glowing tail, and to take advantage of ray-casting. The tail is built from a primitive cylinder shape with an emissive material. Each frame the tail has its length and position adjusted so that the trail's length is the same as the distance the projectile travels covers in 1 second (that is configurable.)

The detection ray at the front of the projectile also has its length adjusted based on the distance the projectile covers each physics frame. Then, when the ray detects a colliding object (for the first time), it:
- Deals damage
- Calls the
get_hit()method on the collider (if it has one)
- Calls the
- Imparts a force
- Applies an impact force to the collider (if it's a RigidBody3D)
- Force is based on the mass and velocity of the projectile
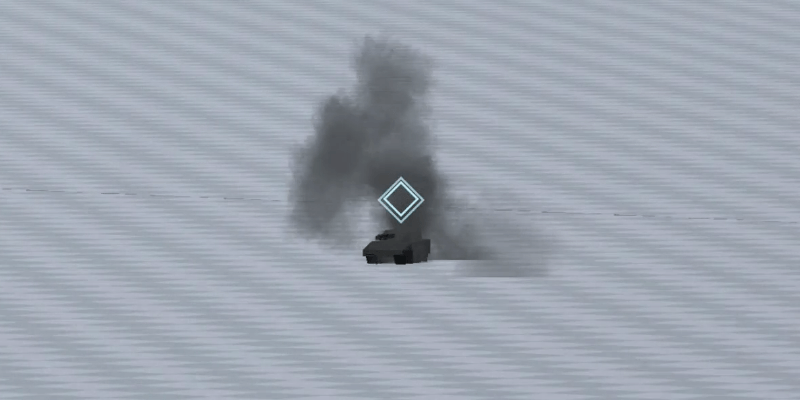
- Adds impact effects
- Spawns sparks and smoke based on the normal vector
- Calls
queue_free()on itself
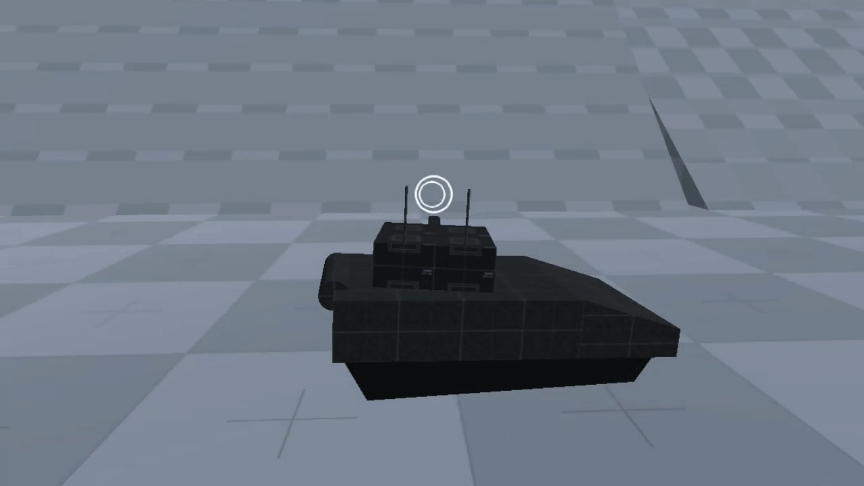
Improved HUD
The HUD was also modified here to use diamond-shaped aiming and viewing reticles. And, in addition, the reticles are now elements within the HUD scene.
Prior to this, the look-direction and aim-direction hud elements were QuadMesh elements within the game world, set to billboard mode and to always be on top. That old method didn't work well because the elements would change their size based on the distance from the camera and the camera's zoom.
The new method uses Sprite nodes in the HUD scene (the HUD is a control element in its own CanvasLayer.) The in-world position of the camera's viewing RayCast3D, and the turret's aiming RayCast3D are provided to the HUD each frame. The HUD un-projects their position from the active camera and positions the sprites at XY positions in the HUD that map to their in-world positions.
The code for this (with some lerp smoothing) might look like:
func _update_look_sprite(delta: float):
    delta = min(delta, 1.0)
    look_sprite.position = lerp(
        look_sprite.position,
        UI.active_camera.unproject_position(look_position),
        delta * 10
    )
This new technique keeps the HUD reticle elements at the exact same size at all times, and ends up being an easier system to manage than the prior in-world version.
The larger diamond is projected from the end of the "look" ray. The smaller diamond is from the end of the "aim" ray.
Note:
This was posted to the Godot subreddit Explosions and impacts made with particles add a nice oompf that totally transforms the shooting experience.
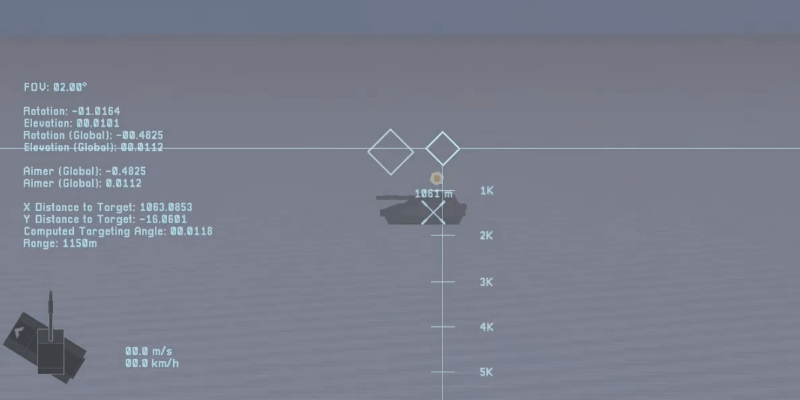
Ranging and Orientation
This step of the project adds a relative orientation indicator for the turret, ranging reticles, and horizontal/vertical axis indicators.
The orientation indicator is in the bottom-left of the HUD.
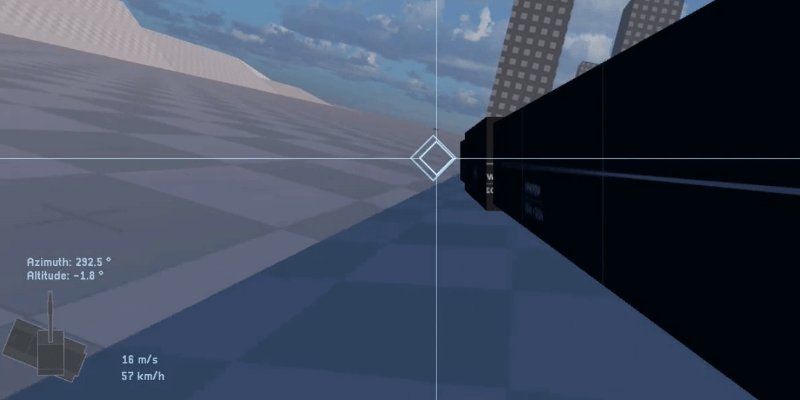
The indicator shows the orientation of the turret relative to the body of the tank. This makes it easier (feasible) to drive the vehicle while in the turret-view as it provides awareness of the position of the vehicle.
The implementation in this project roughly keeps the turret sprite facing upwards, as it rotates the body sprite below it. I say "roughly" because there is some smoothing to the movement, as that makes it feel less jerky and abrupt, so the turret can briefly be slightly rotated.
Ranging
This update to the HUD also added accurate ranging tick marks.
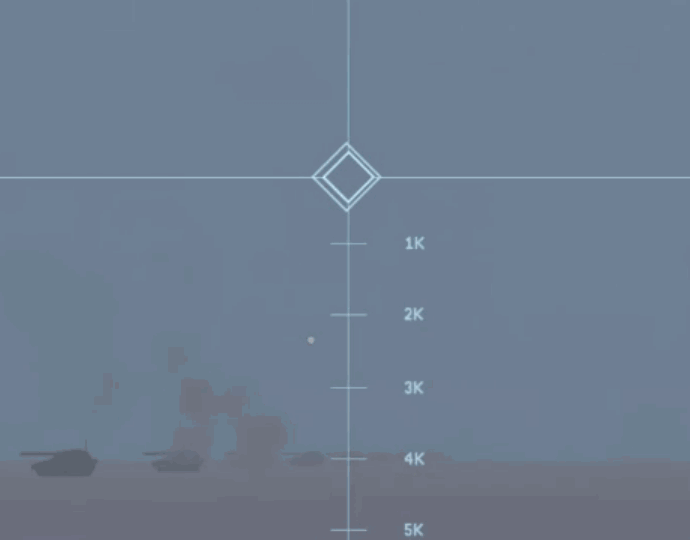
In my previous projects, ranging tick marks were fake lines that just added visual flourish. I wanted the marks in this project to actually be accurate and useful, like in a real weapon's optics. There are methods to determine the position mathematically, but I opted to position them this first time experimentally.
The process roughly looked like this:
- Select a zoom level for all following steps (ex, FOV of 1.0)
- Place objects at known distances (1km, 2km, 3km, etc...) on a flat plane
- Place a tick mark at an estimated correct spot on the vertical axis
- Shoot a projectile and observe the impact point
- Determine if the current tick mark height is too high or too low
- Adjust the tick mark until the impact occurs at the same vertical point as the mark
This provided an accurate scale for that one specific zoom level.
The process was then repeated for a few of the tick marks again at a 2nd zoom level. Then a linear mapping was calculated between zoom levels and tick mark offsets, allowing for the scale to be smoothly interpolated between any zoom level.

The code for that might look something like:
func update_scale(camera_fov: float):
    var ratio = 1 / (camera_fov / 2)
    _position_tick_marks(ratio)

func _position_tick_marks(ratio: float):
    for i in range(ticks.size()):
        ticks[i].position.y = tick_heights[i] * ratio
Note:
This was posted to the Godot subreddit Added an orientation indicator, ranging recitals, and rudimentary horizontal turret stabilization when turning.
Ballistic Solutions
This step solves one of the precursors to the development of NPC AI: having a mechanism to aim and shoot accurately. By implementing code to solve ballistic equations, we can obtain the correct angle at which to raise the barrel to hit a point.
I read a lot of papers and examples while working on this, and by far the most useful resource for me was Solving Ballistic Trajectories - ForrestTheWoods. With the aid of that post, I developed these two GDScript functions to meet my needs.
# Determine the maximum range for a projectile when fired

func max_range(height, launch_speed, angle, gravity):
    return \
    (launch_speed * cos(angle) / gravity) * \
    (
        (launch_speed * sin(angle)) + \
        sqrt(pow(launch_speed, 2) * pow(sin(angle), 2) + 2 * gravity * height)
    )
# Determine the correct turret elevation angle(s) to hit a desired point

func calculate_angles(launch_speed, gravity, x_dist, y_dist):
    var inner = sqrt(
        pow(launch_speed, 4) -\
        (
            gravity * (
                (gravity * pow(x_dist, 2)) +
                (2 * pow(launch_speed, 2) * y_dist)
            )
        )
    )

    return [
        atan((pow(launch_speed, 2) + inner) / (gravity * x_dist)),
        atan((pow(launch_speed, 2) - inner) / (gravity * x_dist)),
    ]
The first part of the returned array is the shallower angle of shot (like an arrow), the second part is the high-altitude high-arching angle of shot (like a mortar.)
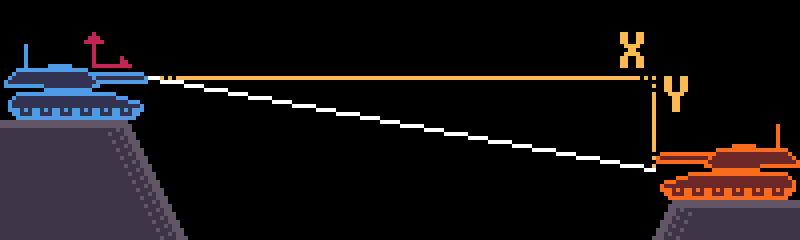
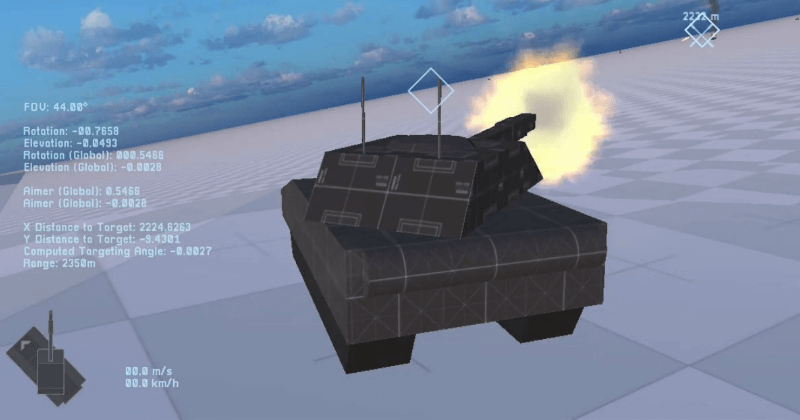
There is a Node3D (called the Aimer) placed inside the turret which is used as the basis from which to take ballistic measurements. The aimer's position moves with the vehicle, but it's rotation is independent so the orientation of the tank won't affect the calculations.
After the ballistic solution is calculated, the aimer points in that direction. The turret's automatic movement code is then activated and executes _process call, where it compares the angular difference between the barrel and the aimer. It then modifies the turret's movement inputs to reduce the angle between the aimer and the barrel.
Running the ballistic solution and automatic turret control on the player tank allows for testing the process and confirming the accuracy.
Note:
This was posted to the Godot subreddit Finally got my automatic ballistic solutions working, even when the shooter is elevated or on a slope. Now I can start the long journey towards implementing an enemy AI!.
Bit of Feedback
Received a comment after sharing this:
Comment:
A quick tip : your camera seems to be is changing it's pitch with the vehicle's alignment to the ground. This is something players do not like without their input. If I were you, I will make the camera adjust pitch only on player input.
[Link]
This was great feedback. I felt like something was "off" with my third-person camera, and this was it. I fixed that shortly after by using a similar technique as the ballistic's aimer: by having the camera's descendants be children of a node that's not affected by the rotation of the vehicle.
Work Continues
Work on this project continues in the next post: