Building a Raspberry Pi Security Camera Network
What's going on around your house when you're away?
I always felt uneasy knowing there's just a wooden door and thin windows protecting my personal space (and even more uneasy when I started to practice lock picking!)
For a while I considered buying a cloud-connected Wi-Fi security camera, but ultimately decided against it. Installing a camera in my house with software and network connections controlled by someone else felt like a bigger invasion of privacy; like entering a Panopticon.
It's not the camera I disliked, it was the ownership model. If I'm going to let a camera watch my life then it needs to run software I can audit, monitor, and trust (and it needs to keep the footage private.)
I have some webcams and Raspberry Pis sitting around. Let's use them to build security cameras and create a DIY home surveillance system.
Preparing the Raspberry Pis
We'll need some USB webcams and a Raspberry Pi (or any computer we can run 24/7.)
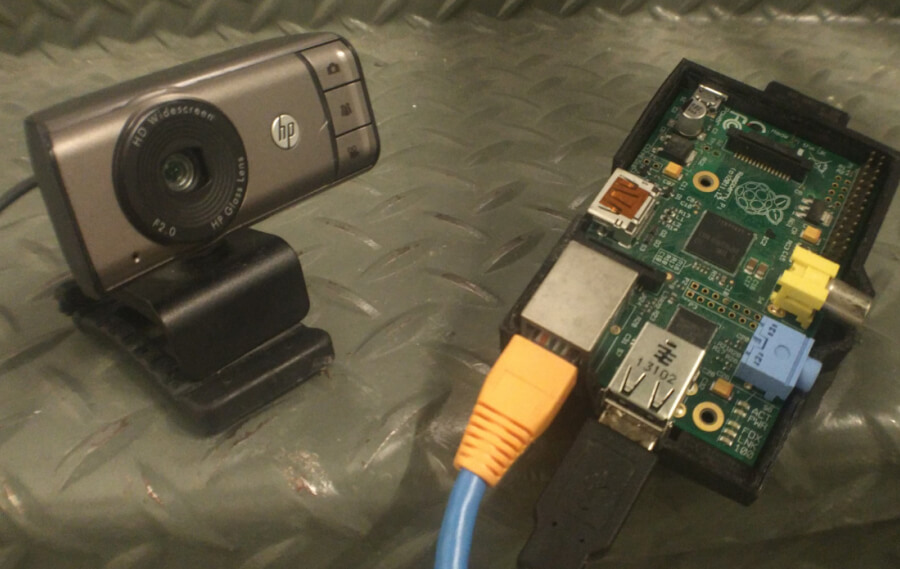
I'm going to use the Raspian-lite Linux distribution for this project, but you can use your favorite flavor. I also did some basic setup to make the Pi easier to find on my network.
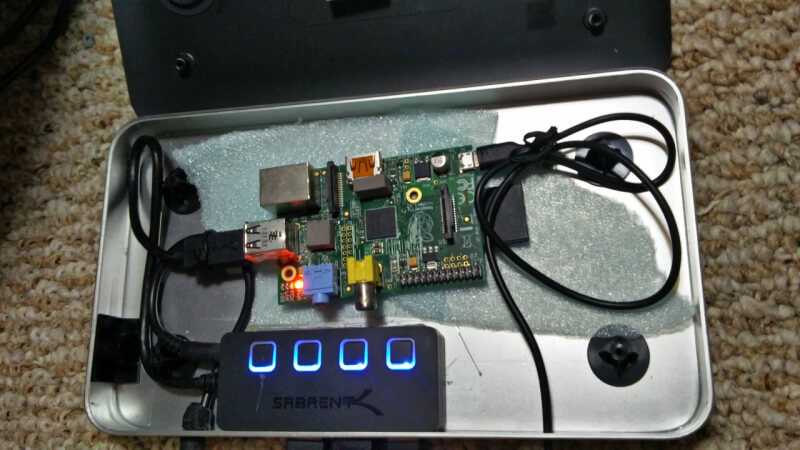
While we can plug the cameras directly into our Raspberry Pi, we might cause a brownout or see strange artifacts:
To fix this, more often than not, we'll also need a powered USB hub to provide sufficient juice to all the cameras.

Checking the equipment
Once we have everything connected we can SSH into our Pi and verify that Linux sees the cameras. Let's list the video devices:
$ ls /dev/video*/dev/video0 /dev/video1 /dev/video2We can also list the resolutions available for each camera. First we need to find their address on the USB bus:
$ lsusbBus 001 Device 004: ID 046d:0805 Logitech, Inc. Webcam C300We can use the Bus and Device values from the the result above to get more information about the video device. For example, if we want the height and width we can call:
$ lsusb -s 001:004 -v | egrep "Width|Height"wWidth 640
wHeight 480
wWidth 1280
wHeight 1024
...Photos on a schedule with LibAV and CRON
The first package I used to interface with a camera was LibAV. It provides some powerful low-level tools for working with media streams, and there's loads of documentation available. Later we'll replace LibAV with Motion but it's still fun to learn.
Installing LibAV is painless:
$ sudo apt-get install libav-toolsCapturing a photo
Once we have the package installed we can start taking pictures.
$ avconv -f video4linux2 -i /dev/video0 -vframes 1 -ss 1 test.jpgThe parameters we're using here are:
-f video4linux2The input format-i /dev/video0The input device-vframes 1Capture one frame-ss 1Delay 1 second (to focus)test.jpgThe output filename
We should be able to FTP into our Pi, download the test.jpg file, and view the result.

Downtown San Francisco captured on an HP-3100 webcam.

Apartment living room, captured on an ELP-USBFHD01M-L180 camera module.
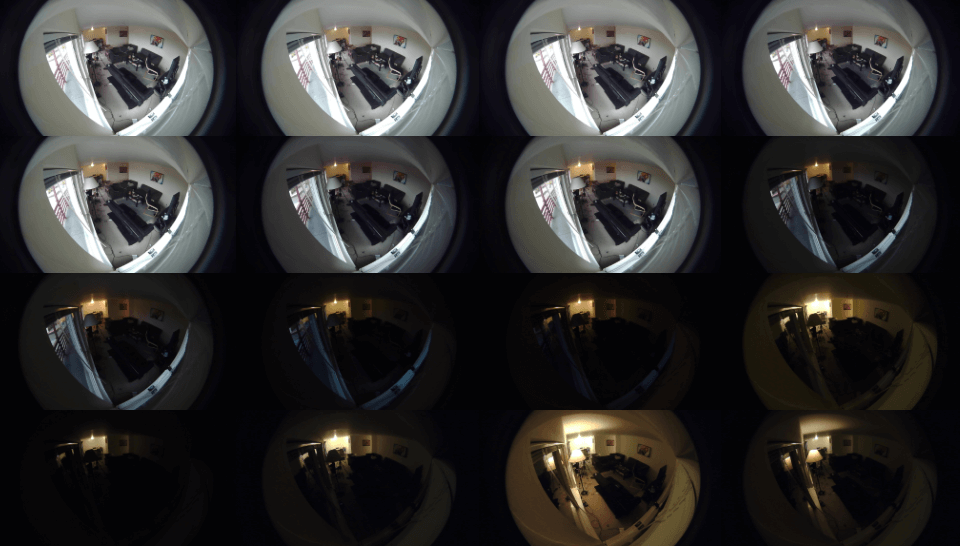
Taking photos every 10 mins using CRON
Going one step further, our camera needs to take photos when we're not home. The easiest solution is to use the Unix utility Cron to schedule captures.
Since we'll be taking lots of pictures we should create a dedicated directory to keep them organized:
$ mkdir ~/cameraNow, open the crontab and add our modified command to the bottom:
$ crontab -e*/10 * * * * avconv -f video4linux2 -i /dev/video0 -vframes 1 -ss 1 ~/camera/$(date +\%Y\%m\%d\%H\%M).jpgUsing */10 * * * * means we're scheduled to take a picture once every 10 minutes. The filename $(date +\%Y\%m\%d\%H\%M).jpg is dynamic, matching the current time and date.
Now we can wait a few hours and see what we catch:
Using multiple cameras
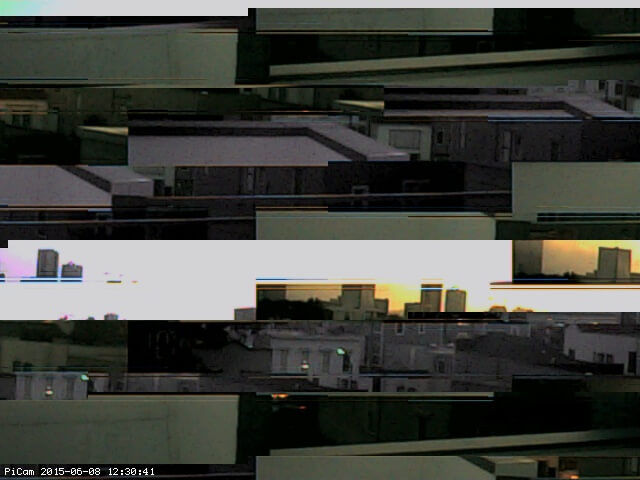
We can plug in multiple cameras but we should be careful. Using them all at the same time might overwhelm our little Pi. This could happen if we instruct Cron to capture from multiple cameras on the same schedule. It'll run the commands in parallel, but they might never finish.
To get around that, we can slow down and step through the cameras sequentially, giving them each the full bandwidth of the USB bus and the maximum processing power of the CPU.
Configuring two cameras
Instead of putting all the pictures into one directory, we should give each camera its own:
$ mkdir ~/camera/0
$ mkdir ~/camera/1
Now we can write a small script to step through the cameras, taking one picture at a time.
Create the file ~/camera/take_photos.sh and add a command for each camera:
#!/bin/bash

avconv -f video4linux2 -i /dev/video0 -vframes 1 -ss 1 ~/camera/0/$(date +\%Y\%m\%d\%H\%M).jpg
avconv -f video4linux2 -i /dev/video1 -vframes 1 -ss 1 ~/camera/1/$(date +\%Y\%m\%d\%H\%M).jpg
Save and exit, then make sure the script is executable:
$ chmod +x ~/camera/take_photos.sh
Now, open the Crontab:
$ crontab -e
And schedule our new script:
*/10 * * * * ~/camera/take_photos.sh
With this setup, every 10 minutes Cron will execute our take_photos.sh script which will take a picture on /dev/video0 then on /dev/video1.
Generating time-lapses from stills
Having a folder of still images is interesting but it's tedious having to manually flip through them.
We could use LibAV to convert the folder of images into a time-lapse video, making it easier to see if anything moves. We'll just need to do a bit of prep work.
Rename the files
The converting process expects the filenames to be sequential integers but our filenames are non-sequential timestamps. We need to rename the files to help LibAV process them.
Lets make a temporary directory to hold the pictures and a renaming script:
$ mkdir ~/camera/timelapseNow, make the script ~/camera/timelapse/rename.sh and add the following:
#!/bin/bash

a=1
for i in *.jpg; do
    new=$(printf "%06d.jpg" "$a")
    mv -i -- "$i" "$new"
    let a=a+1
done
Save and exit. Then make sure our new script is executable:
$ chmod +x ~/camera/timelapse/rename.shWith the renaming script ready we can copy our images into the new folder and rename them:
$ cp -r ~/camera/0/*.jpg ~/camera/timelapse
$ cd ~/camera/timelapse
$ ./rename.sh
This renames the files in the format: 000001.jpg, 000002.jpg, 000003.jpg...
Create the time-lapse
Finally, we can use LibAV to convert the still images into one time-lapse video:
$ avconv -framerate 16 -f image2 -i %06d.jpg -q 2 output.webmGive it a minute to process and... voila!
A time-lapse video of my driveway.
A time-lapse capture of an indoor succulent.
Recording videos with LibAV
Security cameras usually capture more than just still images. Any camera worth its salt should also record video. We can use LibAV to record video in a similar way to photos, just with slightly different options.
$ avconv -f video4linux2 -s 800x600 -i /dev/video0 -t 20 -q 15 output.flv-f video4linux2The input format-s 800x600The resolution-i /dev/video0The input device-t 20Record for 20 seconds-q 15The recording quality (From 2-31 with 2 being the best)output.flvThe output filename
Converting video formats
The file format will be interpreted automatically from the output filename. I've seen the best encoding times (with reasonable quality) using the .flv format.
Despite being quick to encode, .flv videos can't be played natively in all web browsers. Thankfully, we can use LibAV to convert our video to the more accessible .webm format:
$ avconv -i output.flv output.webmThis will take a few minutes as it converts the video frame by frame. Once it's finished we should have a new video file.
This process is how I made these videos:
Fireworks in the fog on the 4th of July.
A calm afternoon with a slow breeze.
Motion Detection with Motion
Taking pictures and videos every 10 minutes produces cool time-lapses, but it might not be the best way to accomplish our goal: Observe what happens when nobody's home.
If an interesting event doesn't coincide with a scheduled capture, we'll miss it.
Detecting Movement
To capture events of interest we need to be able to detect them. One approach to doing that is to constantly monitor the camera and count the number of pixels that change between each frame. As it turns out, we can do this with the Motion package.
This converts our mindless time-lapse camera into an intelligent home security camera.
Using Motion
Install Motion:
$ sudo apt-get install motionUnlike LibAV (where we passed our options in through the command-line), Motion reads its options in from a configuration file.
Make a motion.conf file and add the following options:
videodevice /dev/video0

threshold 1500
event_gap 15

output_pictures best
quality 100
locate_motion_mode on
locate_motion_style box
text_changes on
Documentation: Details about Motion's options: Motion configuration documentation.
We can now run motion with:
$ motionIt'll activate our camera and start watching for movement between frames. If anything is detected we should see output in the terminal similar to:
[1:ml1] [NTC] [VID] motion_detected: Motion detected - starting event 1Once the event ends we should also have an image produced:
[1:ml1] [NTC] [VID] motion_detected: Motion detected - starting event 1
[1:ml1] [NTC] [VID] event_newfile: File of type 1 saved to: ./01-20180531123343-11.jpg
[1:ml1] [NTC] [VID] motion_loop: End of Event 1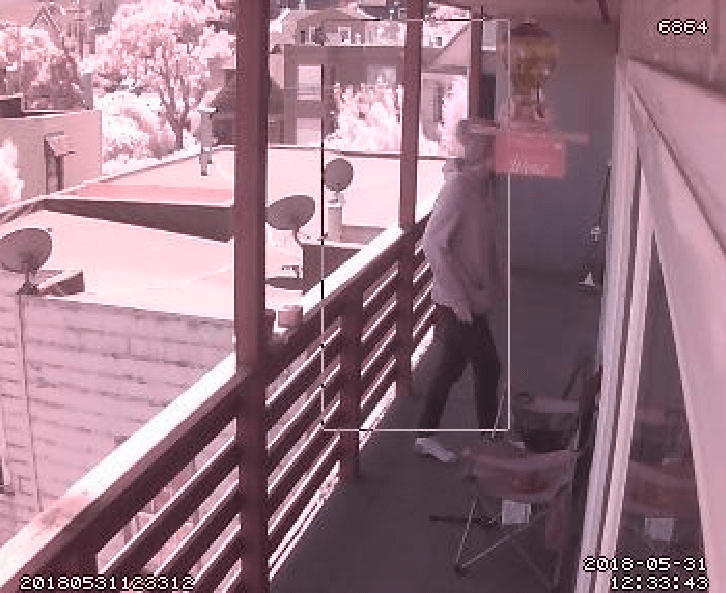
Recording Videos of the Motion
We can modify motion.conf, adding one more option (ffpmeg_output_movies on) to record videos of the events. Our configuration file should now look like:
videodevice /dev/video0

threshold 1500
event_gap 15

ffmpeg_output_movies on

output_pictures best
quality 100
locate_motion_mode on
locate_motion_style box
text_changes on
Now as soon as we have a motion detection event we should begin producing an output video:
[1:ml1] [NTC] [VID] event_newfile: <strong>File of type 8 saved to: ./01-20180531123544.avi</strong>
[1:ml1] [NTC] [VID] motion_detected: Motion detected - starting event 1
[1:ml1] [NTC] [VID] event_newfile: File of type 1 saved to: ./01-20180531123558-06.jpg
[1:ml1] [NTC] [VID] motion_loop: End of Event 1
Multiple cameras
We can run two or more cameras without invoking Motion multiple times. We simply create a camera.conf file for each camera and tell our motion.conf file to include them.
If, for example, we have two cameras, we need two camera.conf config files and one shared motion.conf config file.
camera0.conf camera1.conf motion.confIn the camera configuration files, set the following options:
videodevice /dev/video0
camera_name FirstCam
camera_id 0
videodevice /dev/video1
camera_name SecondCam
camera_id 1Then modify motion.conf, removing the old hardcoded video device and adding our two camera configurations:
threshold 1500
event_gap 15

ffmpeg_output_movies on

output_pictures best
quality 100
locate_motion_mode on
locate_motion_style box
text_changes on

camera camera0.conf
camera camera1.conf
Now running motion should activate and monitor both streams!
Note: I've been able to reliably run two USB webcams (using motion detection) on a single Raspberry Pi provided that their resolutions are low. You can monitor the load on your Pi while Motion is running by consulting top or htop.
Time-lapses with Motion
The use of Motion to detect events is powerful but the time-lapses we made with LibAV were useful too. Some events might be too gradual to trigger motion detection, but we might still be interested in monitoring their progression. It would be nice if we could have the best of both worlds.
Well, we can have motion detection and time-lapse videos without relying on LibAV and Cron. Motion can do both!
Enabling time-lapse output
Simply open a configuration file and add the time-lapse options:
timelapse_filename %Y%m%d-timelapse
ffmpeg_timelapse 60
ffmpeg_timelapse_mode daily
Now when we run motion we'll have our motion detection running plus we'll save a frame into a time-lapse video every 60 seconds (with a new file started daily.) We don't even need to run manual scripts to rename files or convert media!
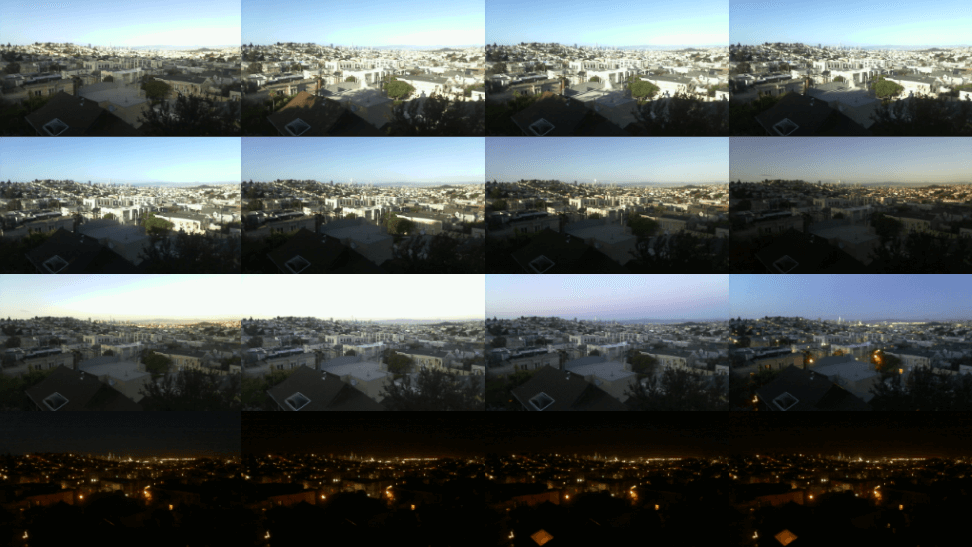
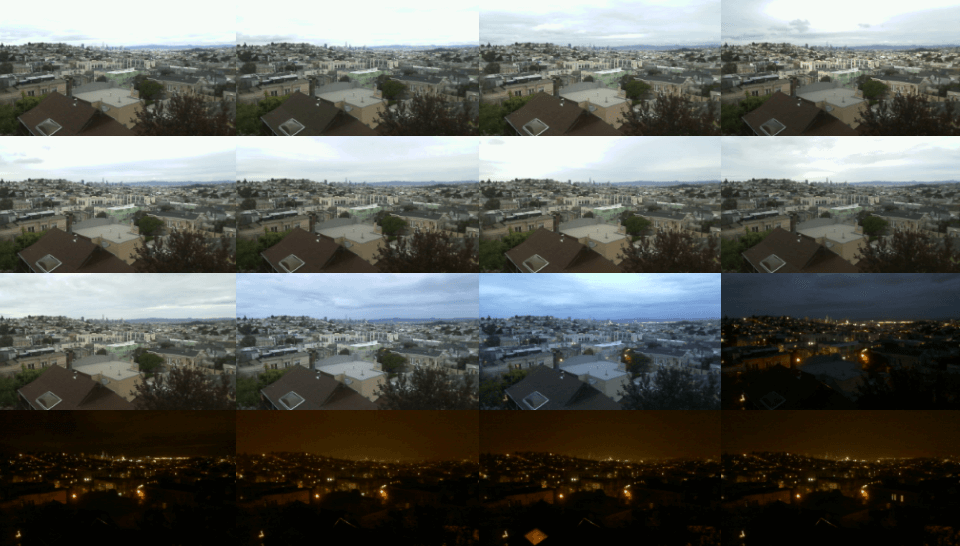
Let the camera run for a day and check the result:
Time-lapse video of a sunrise, sunset, and foggy night in San Francisco.
Live Video
What if we hear something outside and want to use our cameras to investigate the cause?
Currently the only way to "view" a camera is to first hope that something triggers motion detection (or manually run LibAV), then download the video when it's finished recording, and then finally watch it. It's a pretty inconvenient process.
We could save a lot of time by viewing the live video stream directly. Thankfully, Motion also has the ability to show live streams.
Enable the stream
By default, Motion will only allow connections from localhost. It's a secure default that prevents strangers viewing your cameras. However, we want to open up the box to let us watch remotely.
We're going to carefully disable the "localhost-only" protection and replace it with a username and password authentication scheme. (We could also use the safer MD5 digest method.)
Edit the shared motion.conf configuration file to enable network streaming:
stream_localhost off
stream_auth_method 1
stream_authentication username:password
Make sure you change username and password to something strong and secret!
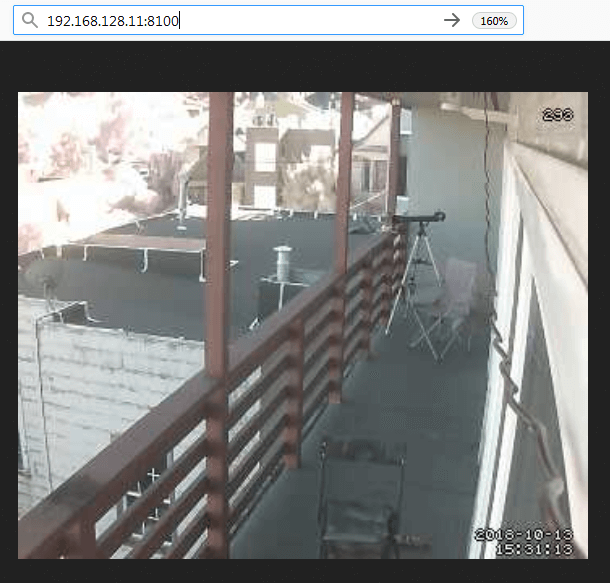
Also edit the camera's camera0.conf configuration to specify a port to stream on:
stream_port 8100Now with Motion running we can see the live video in a web browser by visiting the Pi's IP address and the camera's port. For me they were http://192.168.128.11:8100.
Multiple cameras
The only change we need to make for additional cameras is to give them each a unique port.
If camera0.conf was on port 8100, for example, then camera1.conf can be on port 8101:
stream_port 8101
Saving some bandwidth and processing power
We can reduce the demand on the Raspberry Pi, and our network, by only streaming at full speed if something interesting is happening (aka, moving.)
We can edit the shared motion.conf configuration file and add:
stream_motion onNow Motion will reduce the framerate to 1 frame-per-second when nothing is moving. As soon as something starts to move Motion will stream at the full framerate again, which will continue until it stops.
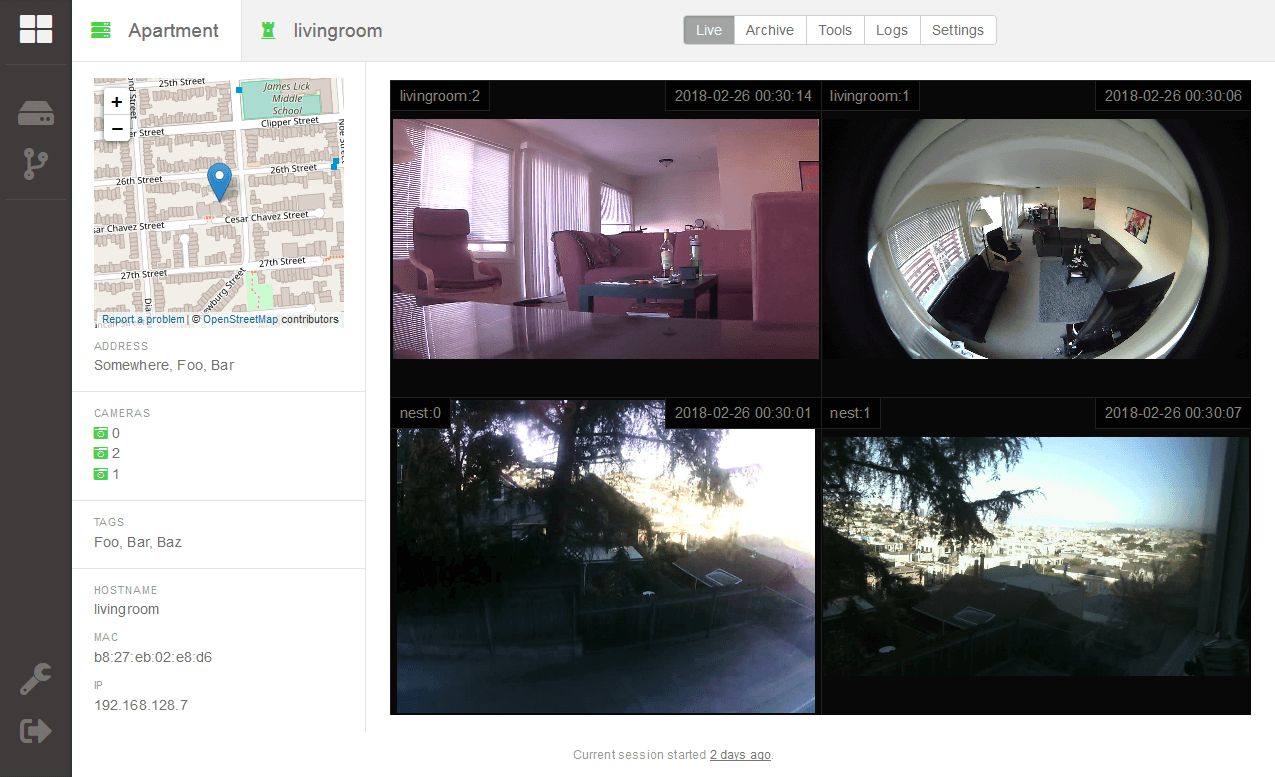
A remote control dashboard
While we're making our camera more accessible on the network, we can consider making the web control panel available too.
Enabling the control panel
The control panel has the same default localhost restriction that the camera streams had. And again, we're going to disable that to give ourselves remote access.
We'll edit the motion.conf config file and add:
webcontrol_localhost off
webcontrol_port 8080
webcontrol_authentication username:password
Make username and password something secure! Anyone with access can execute any command on the Pi.
Using the control panel
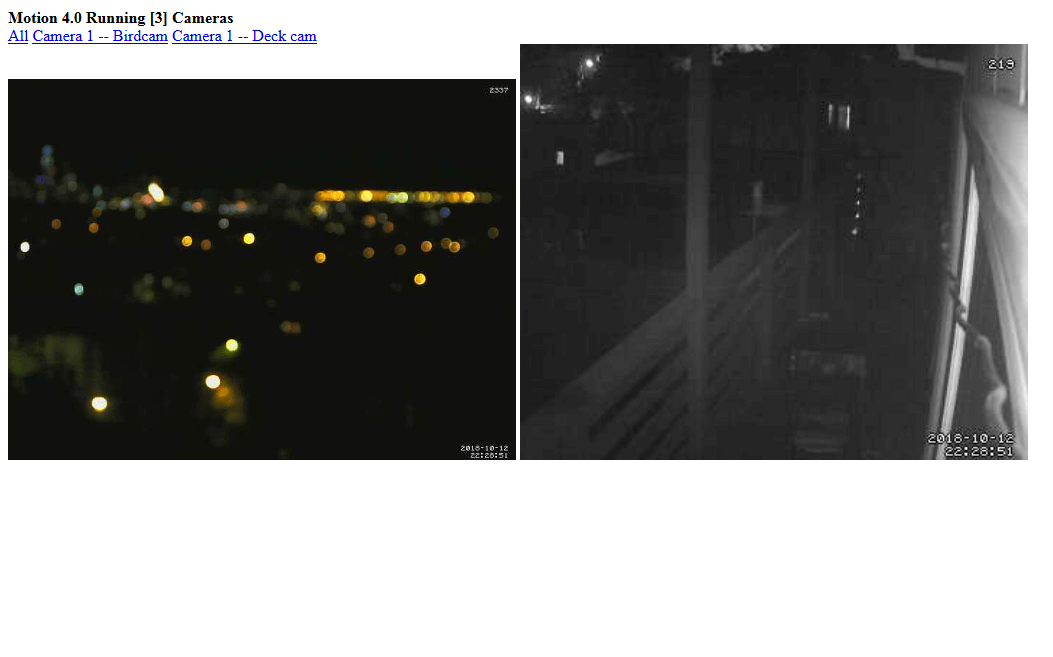
The built-in Motion control panel is lacking in style, but makes up for it in functionality.
The front page shows us live previews of our streaming cameras:
The web control panel a/assetsso lets us interact with the cameras while they're running. One of the most powerful tools is the ability to change configuration settings on the fly:
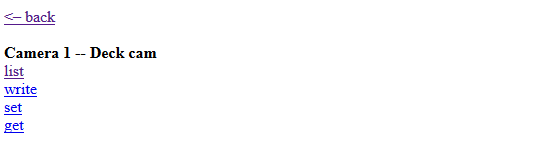
And we can also enable or disable motion detection at will.
Custom dashboards?
If you want to go even further you might build a dashboard that combines several Raspberry Pis with several cameras into a single dashboard!
I'm working on one for my deployment and hope to share it as a project soon:
Protecting the hardware
If you think you're going to keep your system running for a while it's probably wise to protect all the components from their environment.
My housing for a Pi
I recycled what I had available into enclosures for this project; a bricked firewall and an external hard drive's enclosure:

Camera covers
Likewise, if you're doing anything outdoors, you might want to protect your cameras.
Try as I might, I couldn't see downtown as clearly from the inside as I could from the deck. I wanted to be able to leave a camera out there without it being exposed to the elements.
I first built a watchtower out of cardboard (covered up in clear packaging tape) with two glass windows from an unused picture frame.
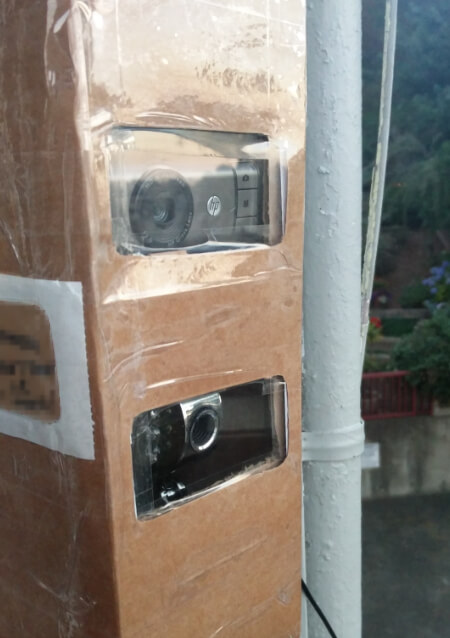
It isn't perfect but it might qualify for an IP54 rating. ;)
Thanks for reading!
Wow, you made it to the end! I hope you learned a bit, or at least enjoyed the pictures.
Want to see more of these pictures and videos? Take a peek at my Raspberry Pi Webcam Gallery. It has some of the most interesting/artistic shots collected while working on this project.